Lenovo computer company has developed a easy Driver Tool update, that makes it easy for end user to download and update any Lenovo computer hardware. The Tool is simple and user friendly.
Part 1: Download and Install the Lenovo System Update Tool
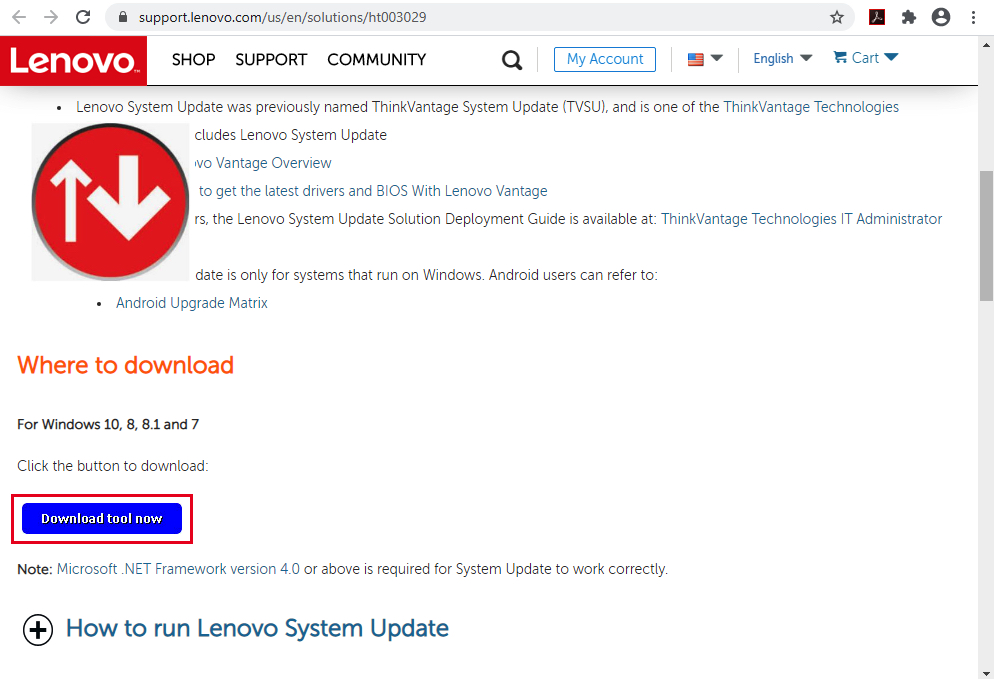
1. Go to this Link: https://support.lenovo.com/us/en/solutions/ht003029
> Click “Download tool now”
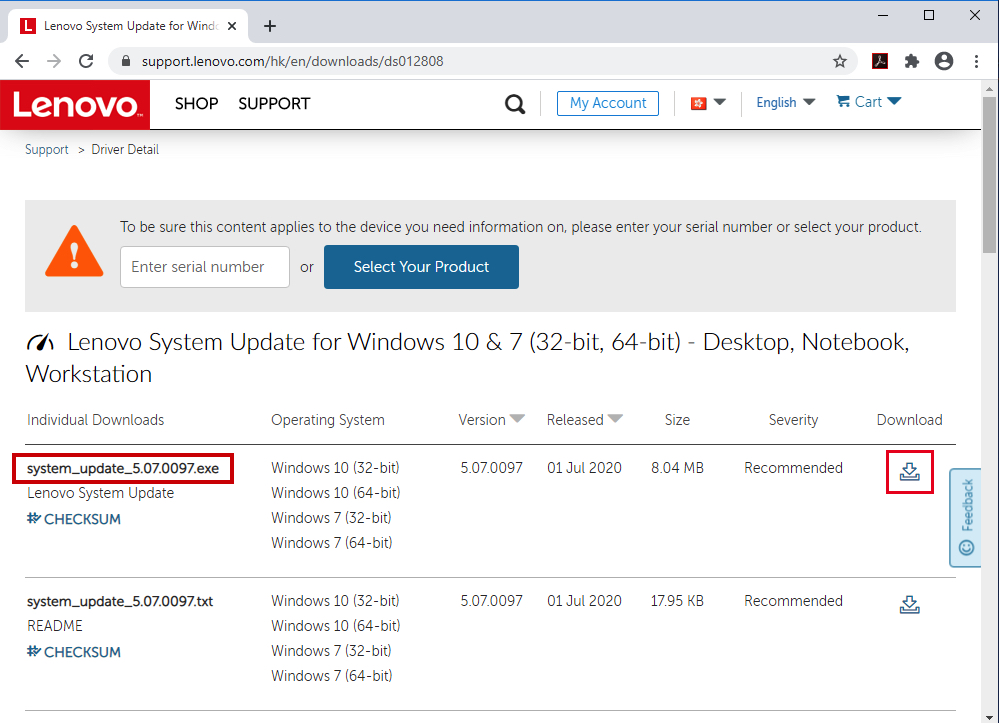
2. This is the shortcut Link
> Click the download button
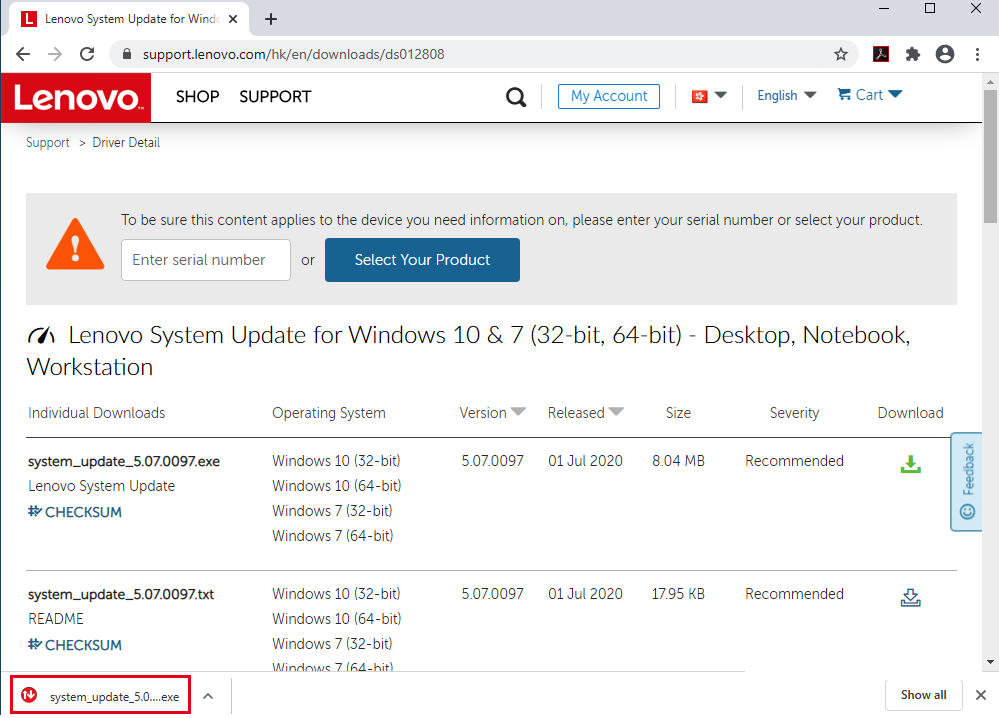
3. Run the Downloaded file
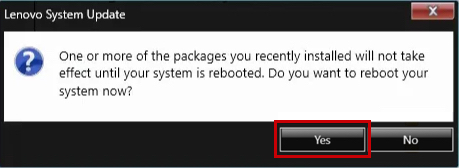
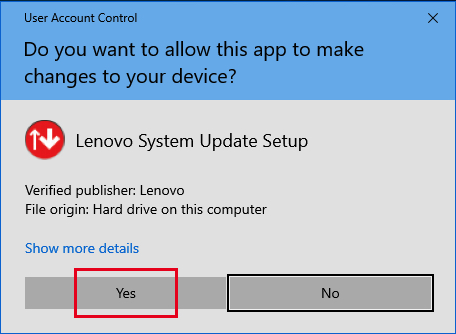
4. Click Yes
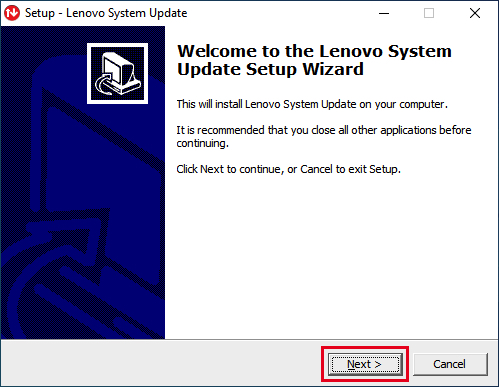
5. Click Next
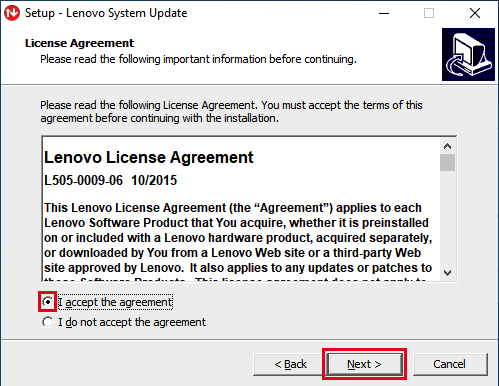
6. Tick “I accept the agreement” > Click Next
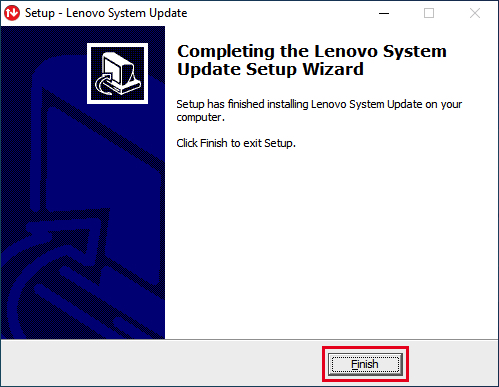
7. Click Finish
Part 2: How to Run Lenovo System Update and Update Windows Drivers
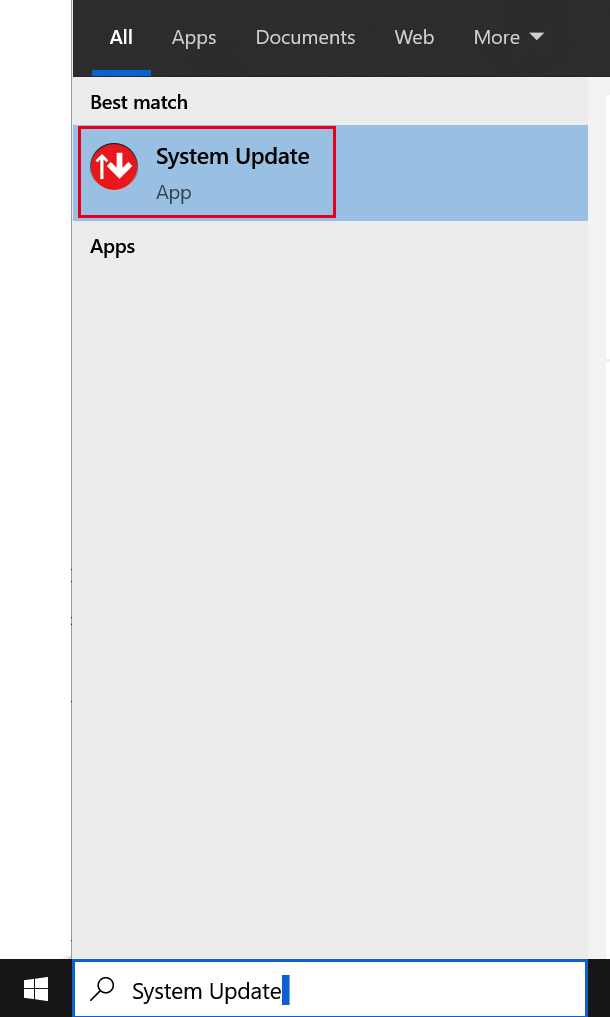
1. Using Windows Search > Find and Run System Update
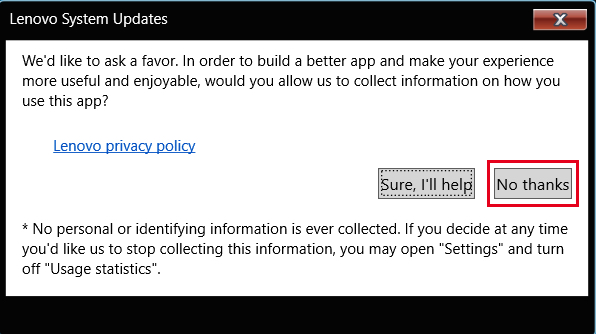
2. Click “No thanks”
3. Click Next

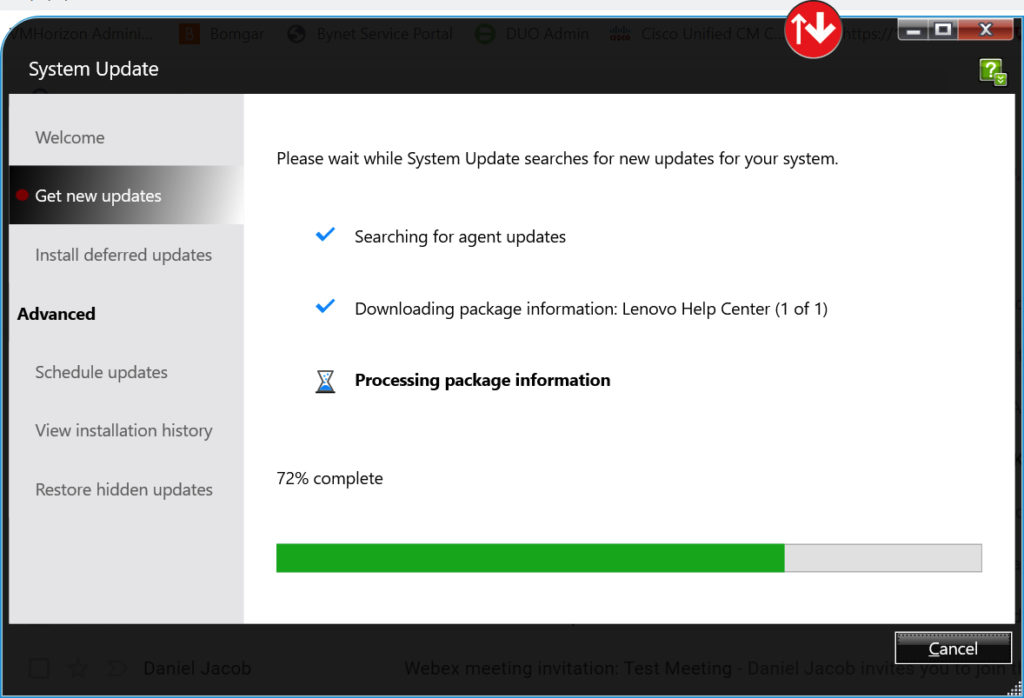
4. Loading
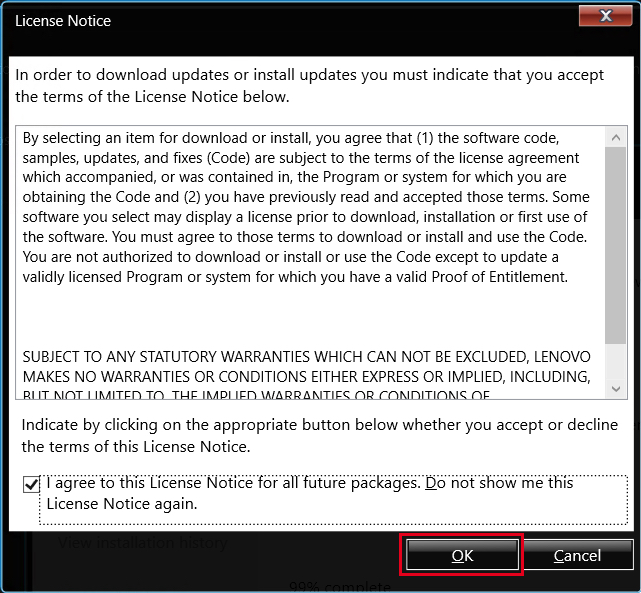
5. Tick “I agree to this License Notice for all future packages.”
> Click OK
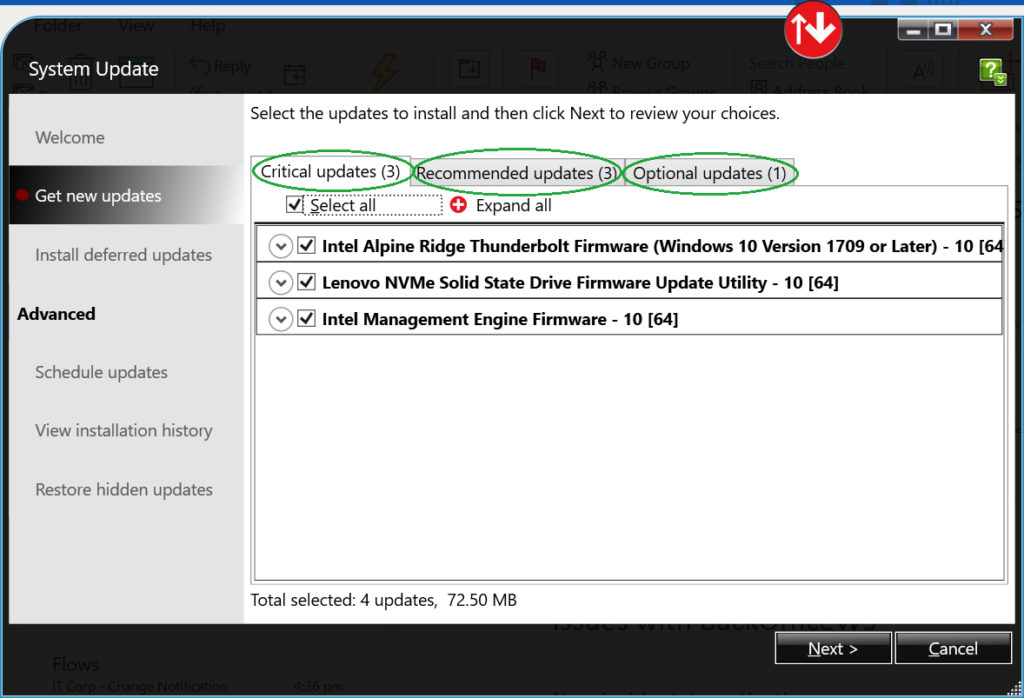
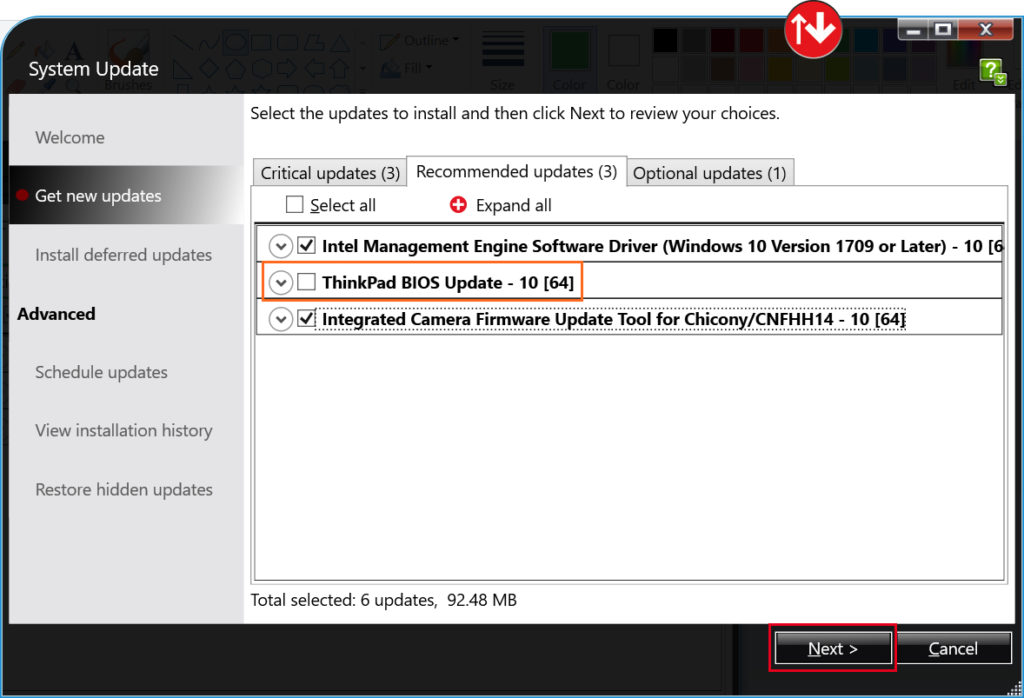
6. Select and Review All the Drivers you want to update
> It’s highly recommended to select All under “Critical Updates” Tab
7. It’s recommended not to include “ThinkPad BIOS update”
> Do this only if you have a valid reason to update the BIOS firmware
> Click Next
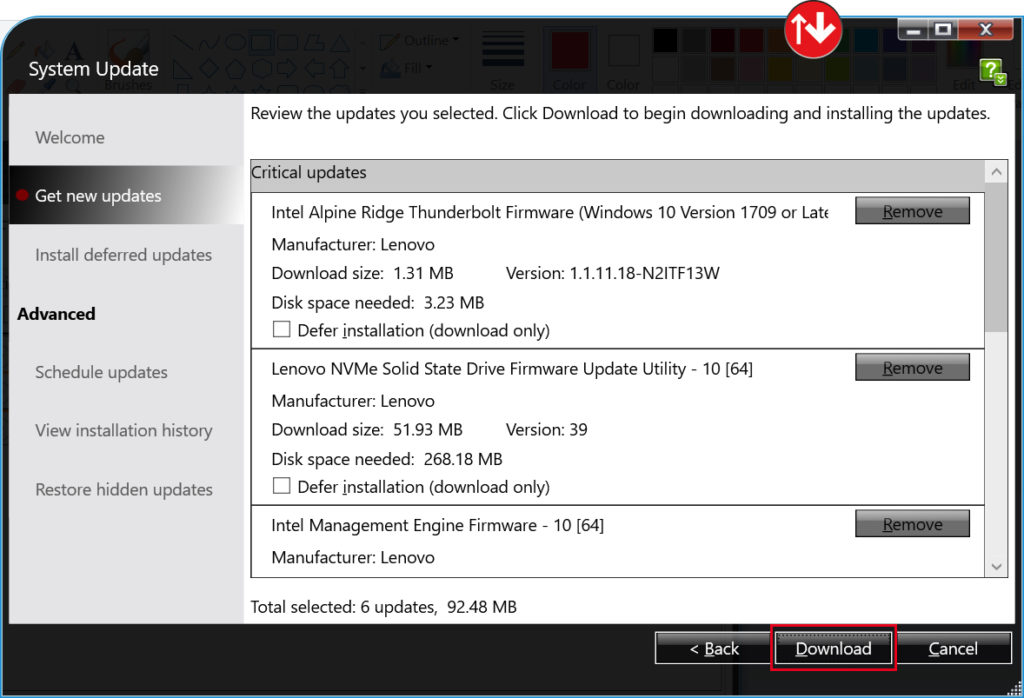
8. Click Download
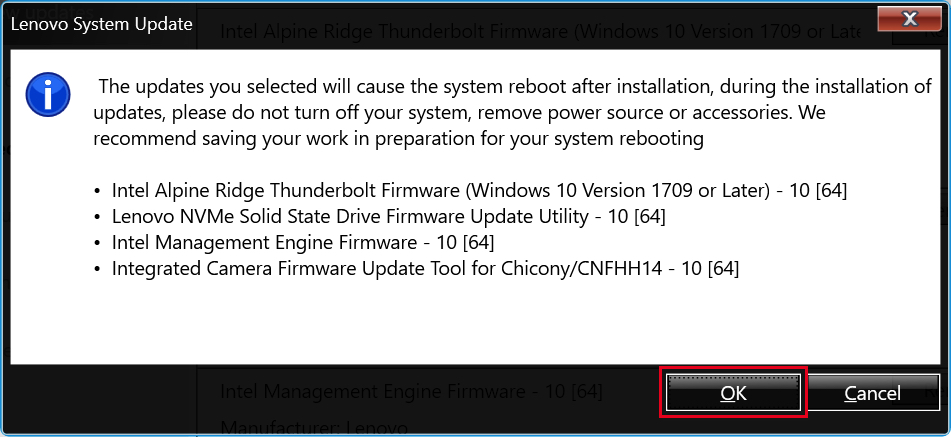
9. Restart will be automatically initiated at the end of the Update Process
> For Laptop Device – Please make sure to Plug-in the Power AC Charger (required)
> Please Save All your documents, Close other running applications
> Click OK
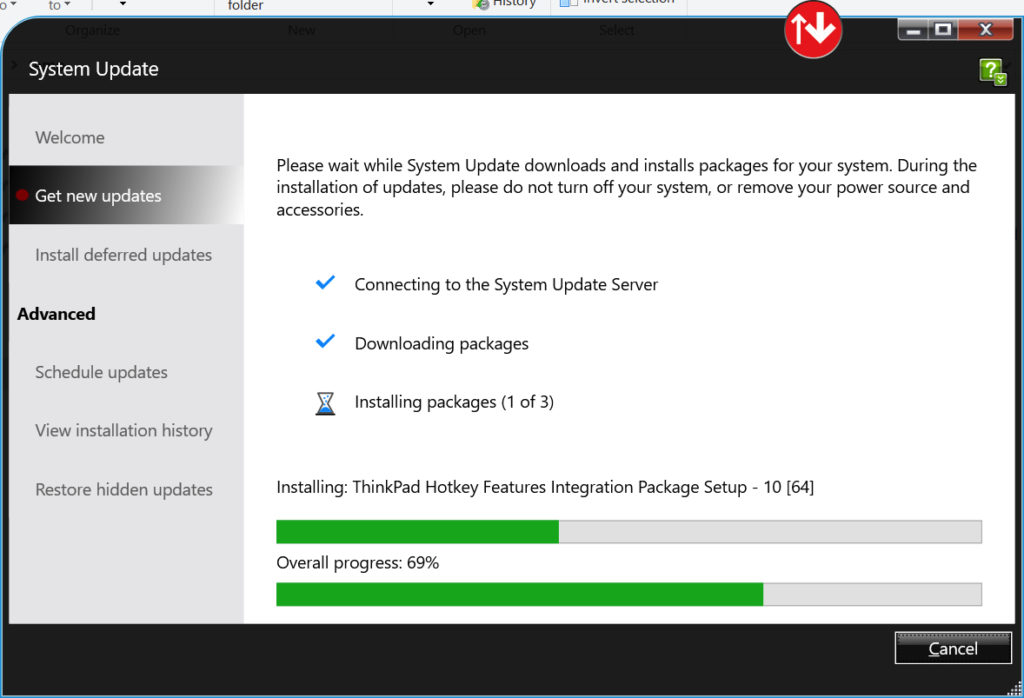
10. Update in progress
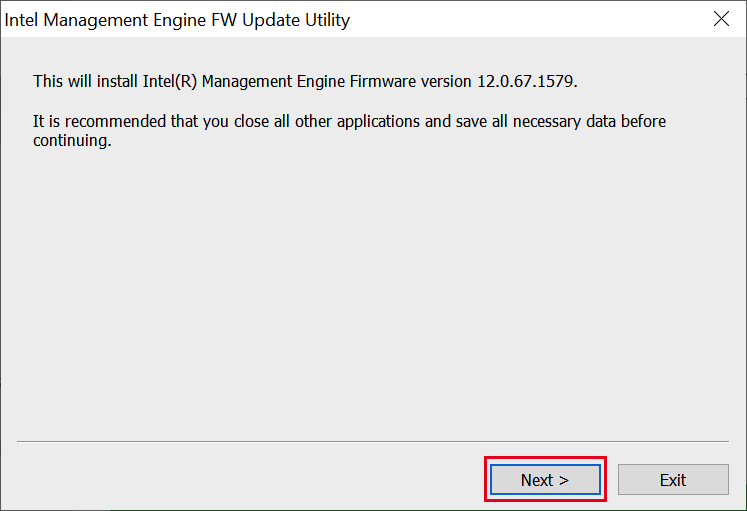
11. Click Next
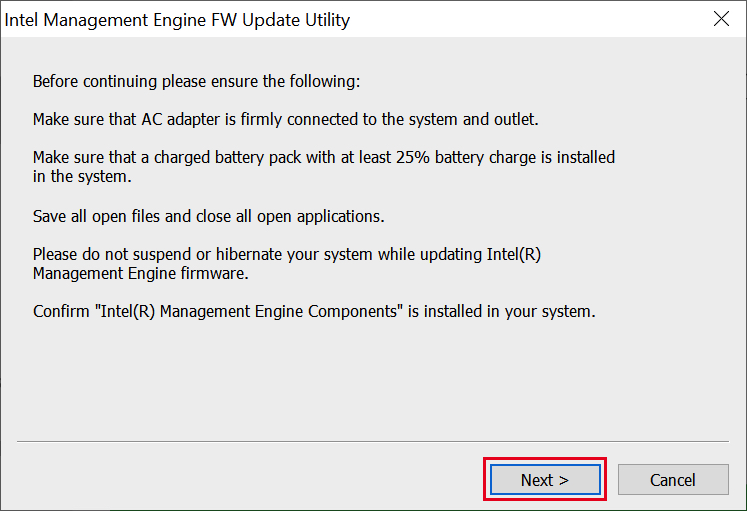
12. Make sure the Power AC Charger is plugged-in
> Click Next
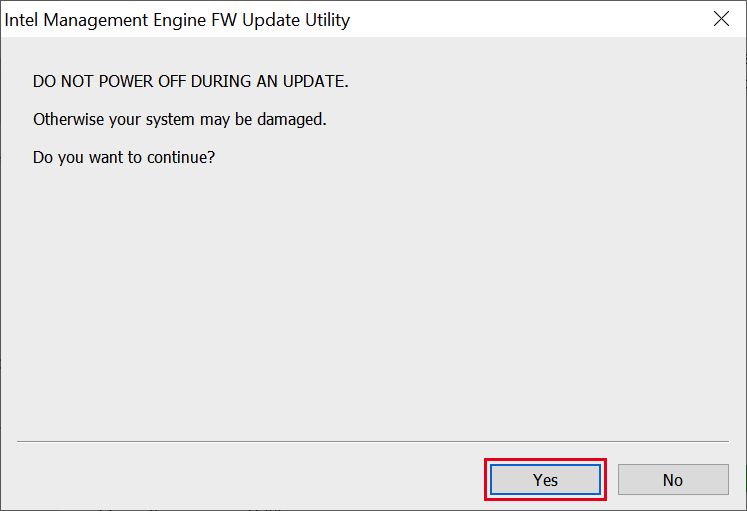
13. Click Yes
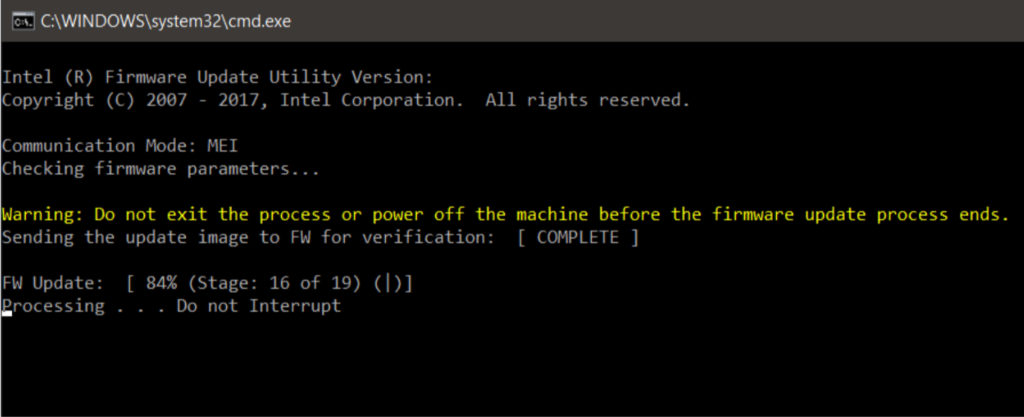
14. Intel Management Engine Firmware Update will finish automatically
15. Click Yes – It will automatically Restart